Visual Paradigm Online offers a diverse range of 3D characters in different styles, with each character having its own unique body structure, bone settings, and proportions. Even characters within the same family may behave or look slightly different when performing the same action due to these variations. This can sometimes cause the poses or movements to appear unnatural or misaligned. In such cases, manual adjustments are needed to perfect the animation. In this tutorial, we will show you how to use the Pose Offset feature to fine-tune character actions and poses, ensuring that they look smooth and natural.

Understanding Editing Offset #
The term “editing offset” refers to the process of manually adjusting the bones inside a 3D character. Every character’s movement, pose, and action is the result of manipulating these internal bones. Editing offset allows you to rotate and position each of these bones separately, which helps you achieve the precise pose or movement you want. This feature isn’t limited to static poses—it can also be used to customize ongoing actions in real time, ensuring that the entire movement looks as intended. In this tutorial, we’ll focus on how to use Pose Offset to correct poses and enhance character actions for a more polished result.
Pose Correction Process #
In the VP Online editor, select the character you want to adjust, and click the “Edit Pose Offset” button at the top.

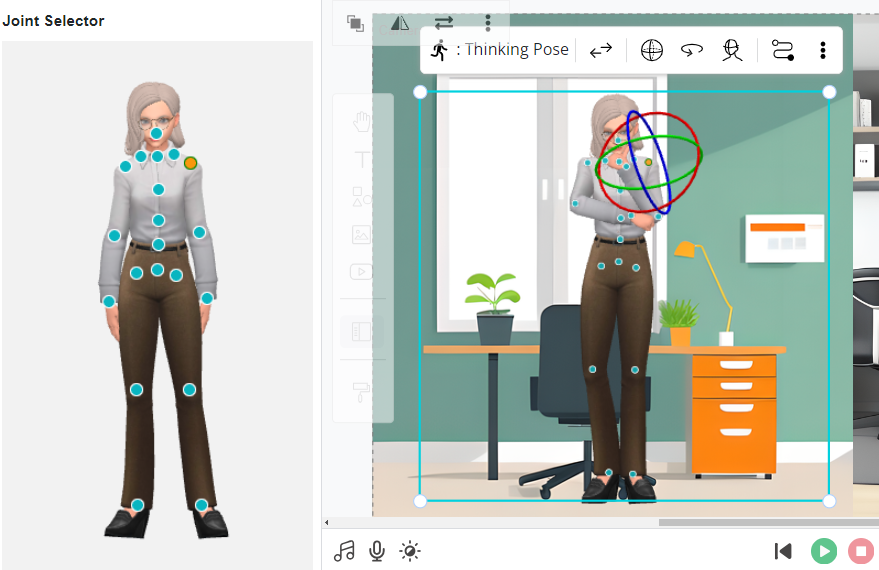
The joints of the character’s bones will be highlighted, and a reference model in the standard idle pose will appear on the left. To adjust the character’s pose, click on any of the joints, and a gizmo will appear. The selected joint will be shown as orange. You can then rotate the joint by dragging the gizmo.
Hint: If a joint is hard to select due to overlapping, you can select the joint on the reference model, and the selection will automatically update on your character.
For action adjustments, move the playhead on the timeline to ensure the changes look natural across the entire animation. If only part of the action needs adjustment, consider splitting the action for more focused edits. Once you’re satisfied with the adjustments, click the “Finish Editing” button at the top right to apply the changes.
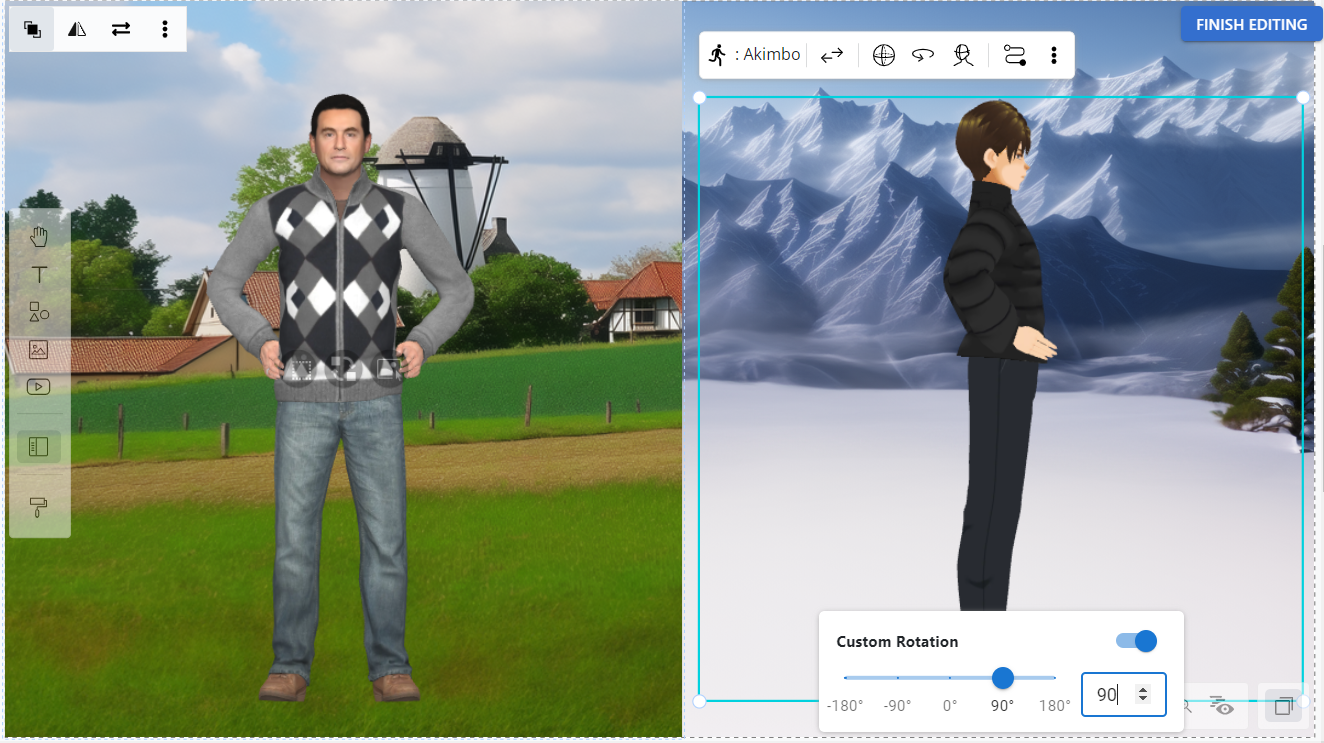
Moreover, as 3D characters, we have the ability to rotate them based on the needs of the scene. This flexibility means that simply focusing on the front view may not be enough. Rotating the character allows us to ensure that the pose and actions look good from all angles, which is crucial for dynamic scenes or complex animations.
If we need to rotate the character or want to store the action for later use, it’s essential to make sure that the action appears smooth and natural in every orientation. To achieve this, use the rotation feature to thoroughly check and adjust the pose from different angles, ensuring the animation works well in every perspective.
Benefits of the Pose Offset Feature #
- Fixing Misaligned Actions: When characters with different body types perform the same action, slight misalignments can occur. Pose offset allows you to correct these by adjusting individual bone joints, ensuring that each character performs the action naturally, regardless of body shape.
- Improved Action Precision: With pose offset, you can fine-tune specific movements by rotating and adjusting joints. This level of precision gives you the control to create smooth, detailed actions that feel realistic, enhancing the overall quality of your animation.
- Adaptability Across Character Families: Even within the same character family, slight differences in anatomy can affect how actions look. Pose offset enables you to tweak poses for different characters without having to rebuild actions from scratch.
- Free Pose Creation: Pose offset isn’t just for fixing errors; it also gives you the freedom to create entirely new poses. By manually adjusting each bone, you can experiment with custom poses, allowing for greater creativity and flexibility in character animation.
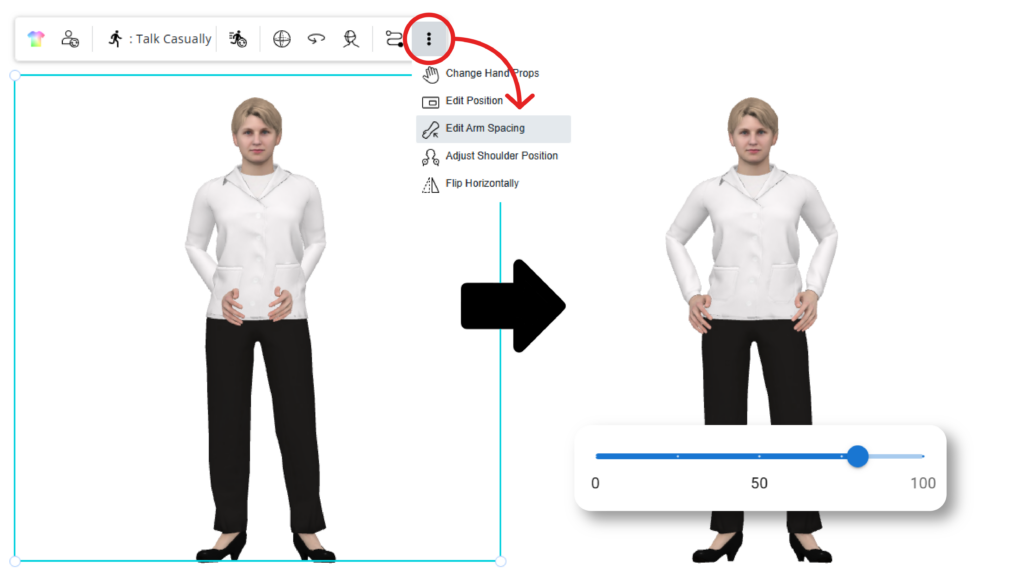
Adjusting Arm Spacing: Another Way to Customize Poses and Actions #
Aside from Pose Offset, another common method for customizing your character’s pose and movement is adjusting the arm spacing. This feature allows you to control the distance between the character’s arms and the body, which can be essential for actions like lifting, pushing, or holding objects. By adjusting the spacing, you can make the character’s movements look more realistic and better suited to specific scenarios. This feature, combined with editing offset, provides a comprehensive toolkit for creating polished and dynamic animations in VP Online.